Creating and editing a vacancy
Create a vacancy in Pressburst, preview how it will appear to candidates and publish it to your available recruitment channels.
Create a new vacancy
Open HR and select Vacancies.
From the Vacancies page, click Add Job and select the school you are recruiting for.

Pressburst opens a new vacancy form. You can either enter the vacancy details manually or use Create from Job Description to extract key information from an existing document or web page.
For more information, see Create from a job description.
The vacancy form
The vacancy form brings everything you need to create and publish a vacancy onto one page. As you work, changes are saved automatically and the Live Preview shows how the vacancy will appear when published.
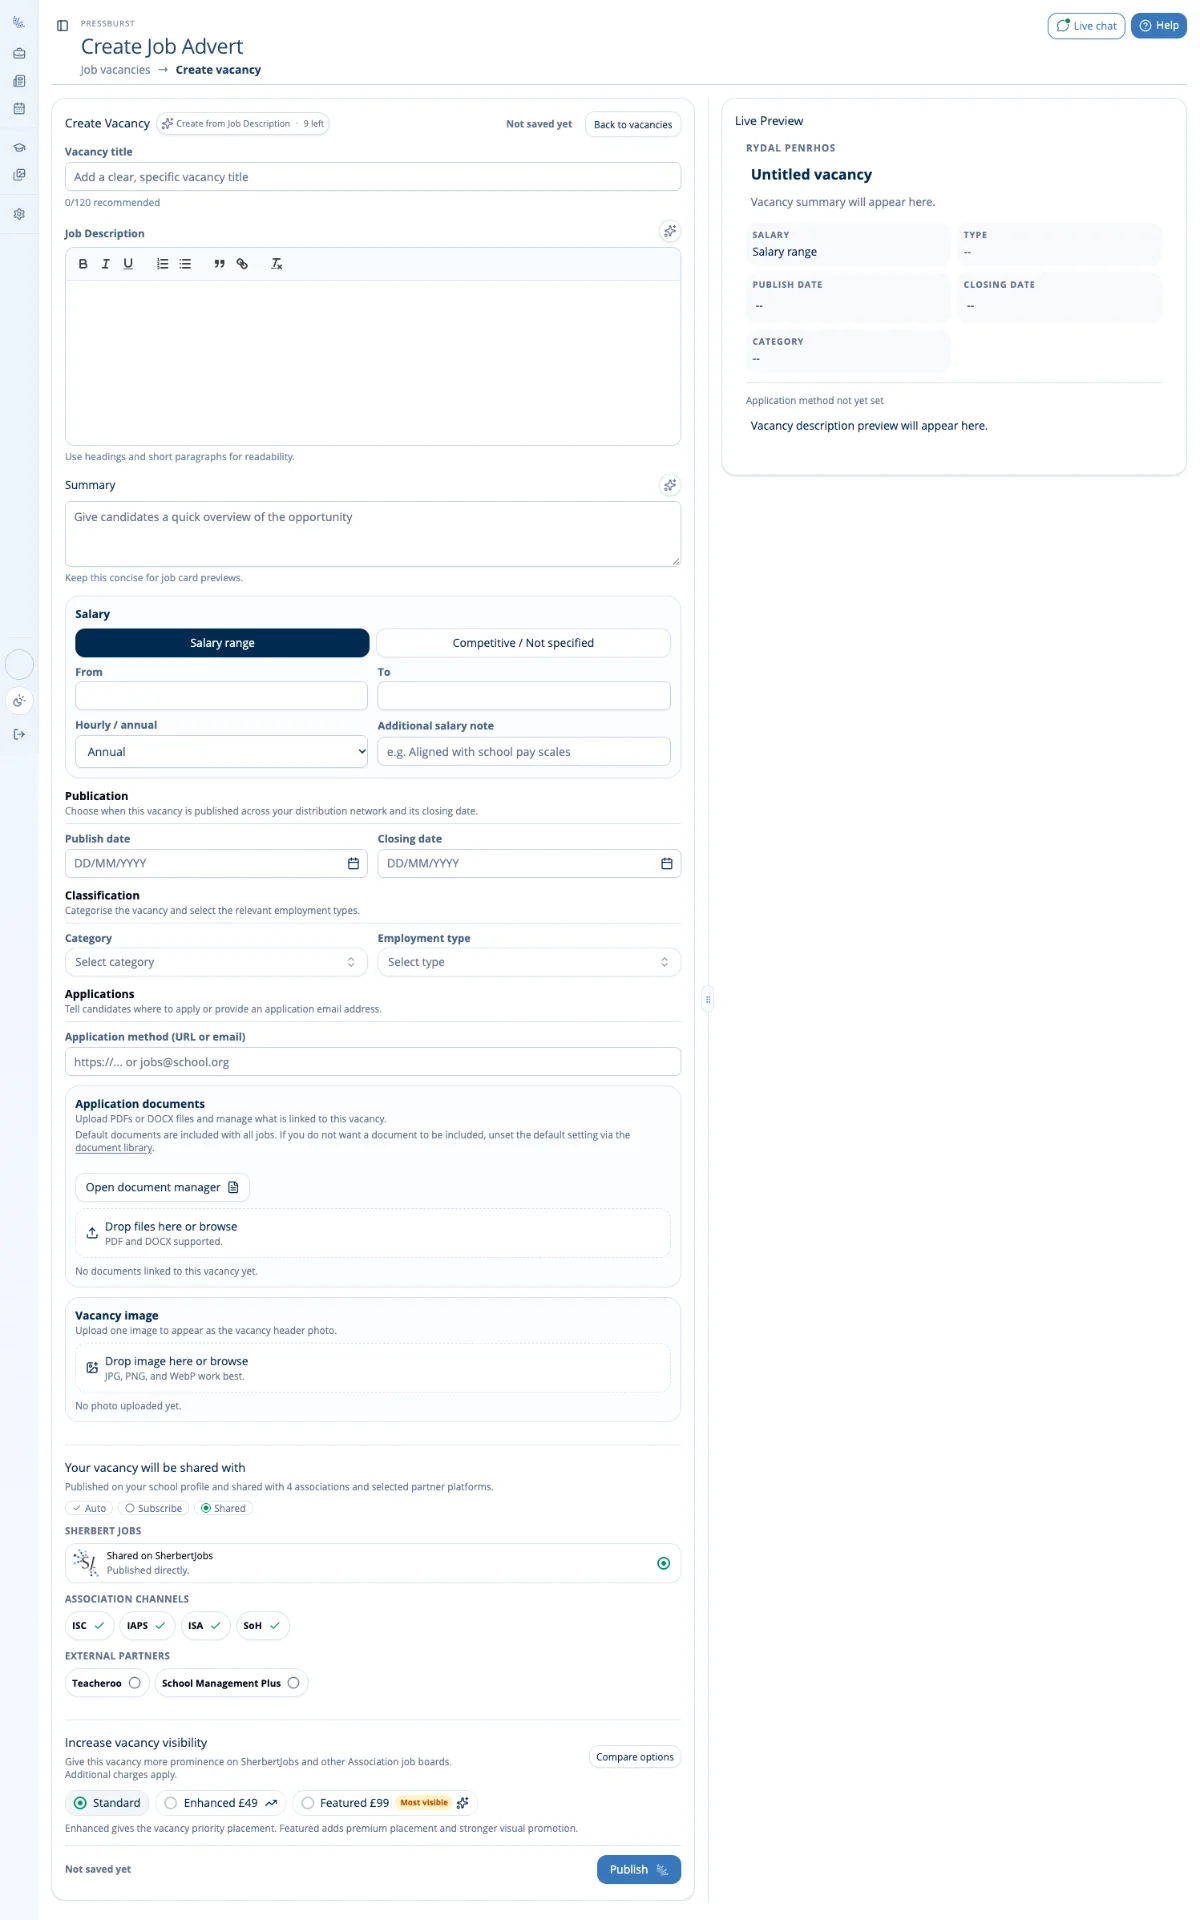
The form is divided into sections for the vacancy content, salary and publication details, applications, distribution and vacancy visibility.
Vacancy content
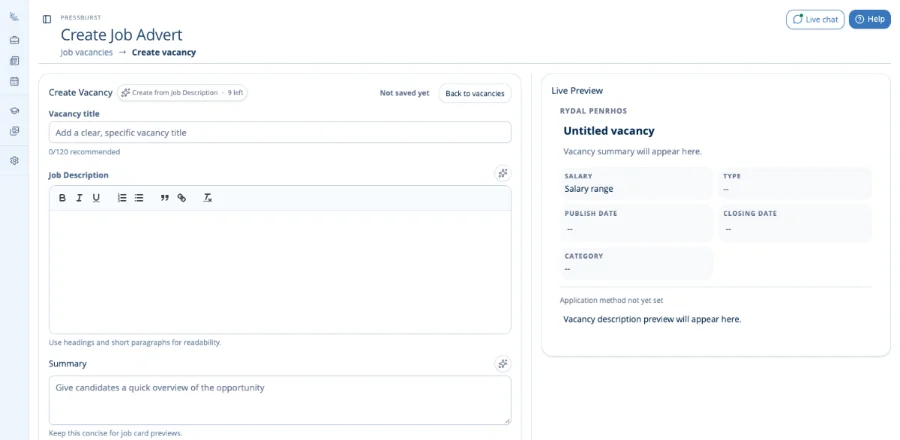
Vacancy title
Enter a clear, specific title for the role.
Job description
Enter or paste the full job description.
The formatting toolbar allows you to structure the description using headings, lists, links and other formatting.
You can also select Improve Description to use Pressburst AI to improve the clarity, structure and readability of your existing description.
The AI writing workspace opens alongside the vacancy form, allowing you to review suggested changes before applying them.
See AI writing tools for more information.
Summary
Add a short summary of the vacancy. This can be used by Pressburst and its distribution partners where a shorter description of the role is required.
Pressburst can also generate a summary from your job description using the AI writing tool.
Live Preview
The Live Preview updates as you work, allowing you to check how the vacancy will appear to candidates before publishing.
When you use Improve Description, the Live Preview is temporarily replaced by the AI writing workspace. Once you apply or cancel the suggested improvements, the Live Preview returns.
Salary, publication and classification
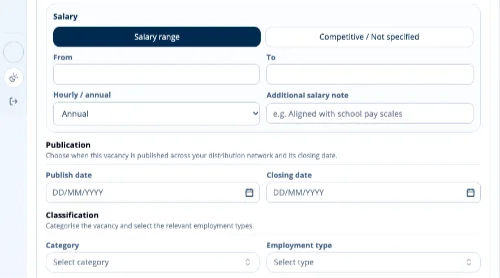
Salary
Choose how you want the salary to be displayed and enter the relevant salary information.
You can also add additional salary information where required.
Publication dates
Set the dates that control when the vacancy is published and when applications close.
Classification
Choose the appropriate category and employment type for the role.
These details help classify the vacancy when it is displayed on Pressburst and eligible recruitment channels.
Applications and vacancy image
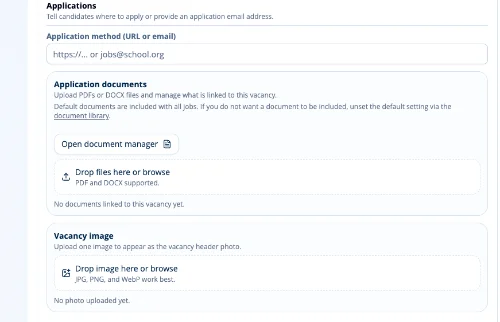
Applications
Enter the web address or email address candidates should use to apply for the vacancy. If your school uses an Applicant Tracking System (ATS), you can enter a direct link to the vacancy’s application page in that system.
Application documents
Add any documents candidates may need, such as an application form, job description or further particulars.
You can select existing files from the Document Library or upload documents directly to the vacancy.
Vacancy image
Add an image if you want one to appear with the vacancy.
Distribution
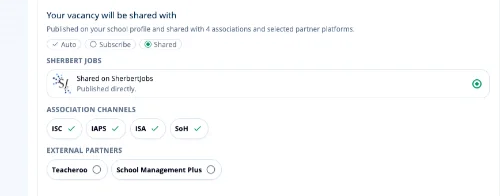
The Distribution section shows the recruitment channels available for the vacancy.
Depending on your school’s memberships and Pressburst plan, these can include:
- SherbertJobs
- eligible Association job boards
- Pressburst recruitment partners
The options shown are specific to your school, so you may see different channels from those shown in this guide.
Vacancy visibility
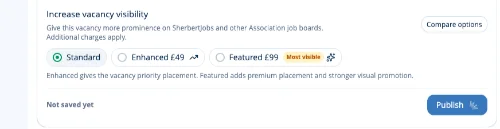
Choose the visibility option you want to use for the vacancy.
The options available depend on your Pressburst plan and the channels to which the vacancy is being distributed.
Publish the vacancy
When you have completed the vacancy and checked the Live Preview, click Publish.
The publishing confirmation sheet opens at the bottom of the page.
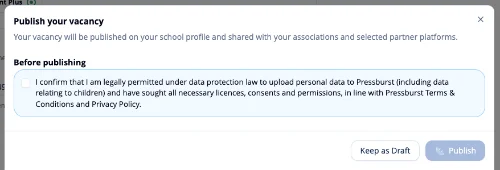
Before publishing, confirm that you are legally permitted to upload any personal data included in the vacancy and that the necessary licences, consents and permissions have been obtained.
Once the confirmation has been completed, click Publish to publish the vacancy.
Edit an existing vacancy
To make changes to an existing vacancy, open HR and select Vacancies, then select the vacancy you want to edit.
The editing screen uses the same form and Live Preview as the creation workflow.
Make your changes and publish the updated vacancy when you are ready.